Key Takeaways
- Daily cleaning and quick visual inspections prevent residue buildup, loose fasteners, and early wear from turning into accuracy drift and unplanned stoppages.
- Routine calibration verification with test weights and consistent logging catches weight drift early, reducing giveaway and avoiding spikes in rejects.
- Weekly precision checks should focus on load cells, hopper mounts, vibratory feeders, and amplitude settings to keep product flow stable and combinations accurate.
- Electrical cabinets, sensors, and air systems need scheduled checks because dust, loose connections, and low air pressure often cause intermittent faults and false rejects.
- Annual shutdown maintenance works best when paired with documentation, SOPs, and spare parts planning so repeat issues are eliminated, and compliance evidence is always ready.
A multihead weigher is only as reliable as its maintenance routine. Neglecting daily cleaning, skipping weekly calibration, or postponing annual inspection, and weighing accuracy degrades fast. Product giveaway climbs. Reject rates spike. Downtime follows.
This guide breaks multihead weigher maintenance into actionable daily, weekly, and annual procedures—whether your line feeds pre-made pouch baggers, VFFS systems, or other packaging formats. Each section answers a specific question that operators and maintenance teams ask in the field. The goal is simple: keep your weigher running at peak precision, extend its useful life, and protect your margins. Follow these protocols, and a well-built multihead weigher can deliver accurate fills for 10-15 years or longer.
What Is A Multi-Head Weigher, And Why Does Maintenance Directly Impact Accuracy?
A multihead weigher is an automated combination scale that uses multiple weigh heads working in parallel to calculate the optimal product combination for a target weight. These systems feed downstream packaging equipment, such as vertical form fill seal machines, at speeds up to 120 weighments per minute.
Maintenance directly impacts accuracy because the precision depends on clean contact surfaces, calibrated load cells, and properly functioning feeders. When multihead weigher maintenance lapses, small issues compound. Dust accumulates. Calibration drifts. Seals wear. The result is product giveaway, increased rejects, and unplanned downtime. With proper maintenance, these machines reduce product giveaway by 20-80% compared to manual processes and deliver a useful technical life of 10-15 years—sometimes 30 years or more.
What Parts And Systems Should You Understand Before Building A Maintenance Routine?
Effective maintenance starts with knowing what you are maintaining. Most multihead weighers use 10, 14, or 20 heads, though custom configurations exist. Each head contains a hopper system with feed hoppers, weigh hoppers, and timing hoppers. The weighing range typically spans 10g to 2,000g.
Critical components requiring routine attention include load cells, vibration motors, belts, seals, sensors, photoeyes, agitator blades, and flighting. Construction is typically stainless steel SS304 or SS316 for GMP compliance and washdown durability. Understanding these systems helps you prioritize tasks. Load cells affect accuracy. Vibration motors affect feeding. Seals prevent contamination. Build your maintenance routine around these priorities.
Why Do Vibration, Product Build-Up, And Wear Cause Weight Drift Over Time?
Weight drift happens gradually. Inconsistent product feeding is a primary cause—when feeders do not deliver uniform product flow, combination accuracy suffers. Product build-up on contact surfaces adds residual weight that throws off readings. Loose load cells lose their calibration baseline. Temperature fluctuations cause mechanical expansion and contraction. Electrical noise introduces signal interference.
Worn feeder liners impede efficient product transfer, forcing the system to work harder and reducing weighing precision. Misaligned buckets cause product spillage and inaccurate weighing. None of these issues announce themselves loudly. They creep in over weeks and months, which is why scheduled daily cleaning and weekly calibration matter. Catch drift early, and corrections are minor. Ignore it, and you face major repairs or replacement.
What Warning Signs Tell You Maintenance Is Being Skipped Or Done Incorrectly?
The machine tells you when maintenance falls behind. Sudden spikes in reject rates signal feeding issues, product variation, or mechanical wear. Drifts in average pack weights—even small ones—indicate calibration problems or build-up affecting load cell readings.
Unplanned downtime is the clearest indicator. In the food industry, unplanned downtime accounts for 5-20% of working time. Much of this is preventable. Over 84% of defective command units and boards trace back to insufficient cooling caused by dust accumulation. If electrical cabinets are not cleaned regularly, heat builds up and components fail. Watch for these patterns: rising rejects, shifting weights, frequent alarms, and unexpected stoppages. Each point relates to maintenance gaps that daily, weekly, and annual inspection schedules are designed to prevent.
What Should Your Daily Multihead Weigher Maintenance Checklist Include?
Daily maintenance is the foundation of weighing accuracy. Pre-start checks take only a few minutes per machine but prevent hours of unplanned downtime. The daily checklist covers three areas: cleaning, inspection, and calibration verification.
Tasks under 10 minutes include visual safety checks, clearing visible product build-up, confirming emergency stops function correctly, and logging production notes. These quick actions catch problems while they are still minor. Skip them, and small issues become expensive repairs. A consistent daily routine keeps the weigher accurate shift after shift.
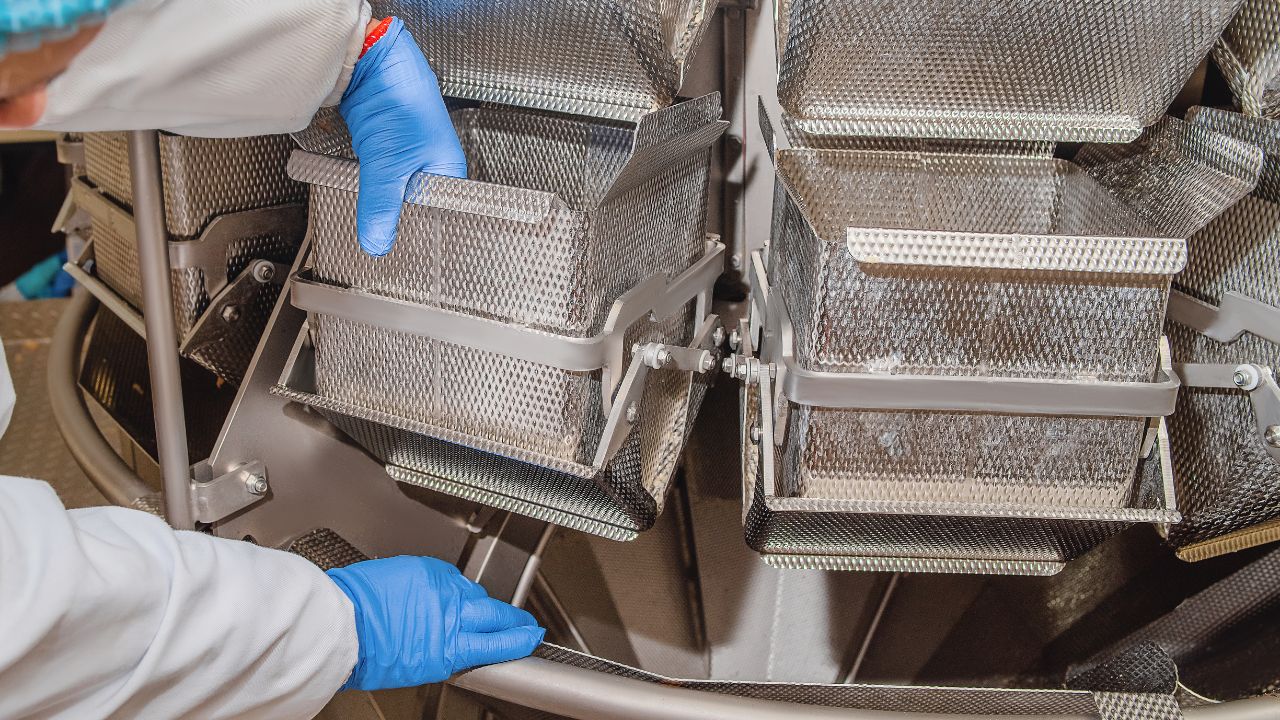
What Cleaning Steps Prevent Product Buildup Without Damaging The Machine?
Daily cleaning removes residue before it hardens or contaminates the next product run. For detachable parts—hoppers, chutes, weigh buckets—use warm water between 30-50°C with neutral, food-grade cleaning agents such as alcohol-based solutions. This combination dissolves most residues without attacking machine surfaces.
Avoid abrasive cleaners, metal brushes, organic solvents like thinners or benzene, and high-pressure water jets. Abrasives scratch stainless steel, creating harboring points for bacteria. Solvents damage seals and coatings. High-pressure jets force moisture into load cells and electrical components. After washing, dry all parts thoroughly before reassembly. Moisture left on contact surfaces causes corrosion and affects weighing accuracy. Choose quick wipe-downs between batches when full disassembly is not practical. Choose full cleaning at shift end when products are sticky, dusty, or allergenic.
What Quick Inspections Catch Early Problems Before They Become Downtime?
A two-minute walk-around inspection catches problems that escalate fast. Check for loose bolts, screws, and damaged cables. Fasteners loosen from constant vibration. Cables fray from friction and movement. Both lead to failures if ignored.
Verify all safety guards are in place and functioning. Listen for unusual noises during startup and operation—grinding, rattling, or clicking sounds signal bearing wear, loose components, or misalignment. Watch for abnormal vibrations that could indicate developing motor or feeder issues. Confirm product feed systems, including vibratory feeders and conveyors, are free from jams or obstructions. These inspections take less time than a coffee break. They prevent the unplanned stoppages that consume 5-20% of production time in food manufacturing.
What Calibration And "Sanity Checks" Should Operators Do At The Start Of Each Shift?
Calibration verification should happen before production begins. Perform a quick calibration check using standard or certified weights. Place test weights in weigh hoppers and confirm displayed values match expected values. Deviations indicate drift that needs correction before product runs.
Some manufacturers recommend daily calibration for consistent accuracy on high-speed lines. Choose daily calibration when running delicate products where grams matter. Choose weekly calibration when products are more forgiving, and line speeds are moderate. Regardless of calibration frequency, record all completed checks, errors encountered, and corrective actions taken. Documentation creates a maintenance history that reveals patterns, supports troubleshooting, and provides audit evidence. Operators who log consistently catch recurring issues faster than those who rely on memory.
What Routine Checks Keep A Multi-Head Weigher Running At Peak Precision?
Weekly calibration and routine inspections bridge the gap between daily cleaning and annual inspection. These checks catch developing issues before they affect weighing accuracy or cause unplanned stops.
A comprehensive weekly maintenance routine ranges from 1 to 4 hours, depending on the number of heads and component accessibility. The time investment pays off in consistent performance. Focus on four systems: load cells and hoppers, vibration feeders, electrical and pneumatic components, and precision verification. Address each systematically, and the weigher maintains accuracy between major service intervals.
What Should You Verify On Load Cells, Weigh Hoppers, And Mounting Hardware?
Load cells are the heart of weighing accuracy. Perform weekly coarse calibration verification using a known test weight or product sample. This quick check confirms the system reads correctly without requiring full recalibration.
More comprehensive multi-point calibrations should be conducted monthly, or when product types change significantly. The full calibration process follows a sequence: warm up the machine to operating temperature, perform an empty-bucket zero check, apply certified weights to single hoppers and combination outputs, then compare the displayed mass to reference weights. Adjust software compensation factors when deviations exceed acceptable tolerances. Check mounting hardware for looseness—vibration works fasteners free over time. Loose mounts affect load cell readings and introduce measurement error that compounds across all heads.
What Should You Check On Vibration Systems, Feeders, And Amplitude Settings?
Vibratory feeders control product flow to weigh hoppers. Inconsistent feeding causes inaccurate combinations. Inspect vibratory feeder springs and agitator parts weekly for wear or loosening. Springs fatigue over time, reducing amplitude and slowing product transfer.
Adjust feeder amplitude and timing only within documented parameters. Over-adjustment causes product damage or erratic flow. Under-adjustment starves the weigh hoppers. Replace worn feeder liners promptly—worn liners impede efficient product transfer and reduce weighing precision. Check the dispersion table for wear patterns, damage, or product buildup. The dispersion table distributes the product evenly to all radial feeders. Uneven distribution means some hoppers fill faster than others, limiting combination options and reducing accuracy. Choose liner replacement when visual wear exceeds 1-2mm depth. Choose amplitude adjustment when product flow slows, but liners appear intact.
What Electrical, Air, And Sensor Checks Prevent Intermittent Faults And False Rejects?
Intermittent faults frustrate operators and waste product. Most trace back to electrical or pneumatic issues that routine checks prevent. Verify air pressure against manufacturer specifications—pneumatic systems open and close bucket gates. Low pressure causes sluggish operation. Inconsistent pressure causes timing errors and false rejects.
Inspect electrical connections for damage, fraying, or loose connections. Tighten terminals that vibration has loosened. Follow filter replacement schedules to prevent contamination of pneumatic components. Check electrical cabinets monthly for dust accumulation and overheated components. Dust insulates heat-generating parts, leading to thermal failures. Over 84% of defective command units and boards result from insufficient cooling. A clean cabinet runs cooler and lasts longer. Choose monthly cabinet cleaning in dusty environments. Choose quarterly cleaning in cleaner facilities with good air filtration.
What Test Weights, Control Charts, Or Repeatability Checks Confirm Ongoing Precision?
Verification proves the weigher performs within specification. Check distribution uniformity and the Coefficient of Variation (CoV) monthly. CoV measures how consistently the weigher hits target weights—lower values indicate tighter control.
Use certified weights or traceable calibration artifacts across typical product ranges. Test at multiple points: light fills, target fills, and heavy fills. This multi-point approach reveals linearity errors that single-point checks miss. Perform quick software and parameter backups weekly to secure recipes, calibration data, and alarm histories. Backups protect against accidental changes and speed recovery after software updates or equipment faults. Document all verification results. Trends in the data reveal a gradual drift before it becomes a production problem. Choose weekly verification when running high-value products where grams directly affect margins. Choose monthly verification when products are of lower value and tolerances are wider.
What Weekly And Monthly Maintenance Prevents Small Issues From Turning Into Failures?
Weekly and monthly maintenance catch problems in the middle stage—after daily checks, but before annual inspection reveals major wear. This preventive layer stops small issues from compounding into failures that halt production.
Deep cleaning takes 30-60 minutes and should happen weekly for most applications. For sticky conveyor belt parts, soak components at 45°C for 5 minutes before cleaning with neutral detergent. This loosens residue without aggressive scrubbing that damages surfaces. The time spent here prevents the unplanned downtime that costs far more than scheduled maintenance windows.
What Should You Inspect And Tighten To Stop Vibration-Related Loosening?
Multihead weighers vibrate constantly during operation. That vibration loosens fasteners, wears components, and eventually causes failures. Check and tighten fasteners, guard bolts, and mounting points weekly. A systematic approach works best—start at the top of the machine and work down, checking each connection point.
Look for unusual wear patterns on cams, vibratory feeder springs, and agitator parts. Asymmetric wear indicates misalignment or overloading. Inspect vibration isolators for wear or loosening—these rubber mounts absorb vibration and protect load cells from mechanical noise. Worn isolators transmit vibration directly to sensitive components. Verify belt tensions on moving components. Loose belts slip and cause timing errors. Over-tight belts wear bearings prematurely. Choose weekly tightening checks for high-speed lines running multiple shifts. Choose biweekly checks for single-shift operations with moderate throughput.
What Wear Parts Should You Monitor And Replace Before They Fail (Seals, Liners, Gates)?
Wear parts have predictable lifespans. Tracking them prevents surprise failures. Load cells last 5-10 years typically, with a 5-year recommended replacement or sooner if calibration drift appears. Vibration motors run 3-8 years, with a 3-year recommended replacement and annual bearing inspections.
Belts and seals have shorter lives—1-3 years typically. Replace them as wear appears and plan for yearly replacement in maintenance budgets. Sensors and photoeyes last 2-5 years. Replace on failure, but keep one spare per major line to minimize downtime when failures occur. Dust filters require replacement every 6 months; a technician completes this task in less than one hour. Choose proactive replacement at recommended intervals for critical components like load cells and motors. Choose run-to-failure for lower-impact parts like photoeyes, where spares are stocked. Document replacement dates to build accurate lifecycle data for your specific operating conditions.
What Software, Recipe, And Parameter Housekeeping Reduces Operator Error?
Software maintenance prevents data loss and configuration errors that affect weighing accuracy. Back up PLC and HMI programs after any changes. A single accidental parameter change can throw off calibration across all heads. Backups enable fast recovery.
Maintain version control for all software. Label backups with dates and change descriptions so technicians know which version to restore. Apply firmware updates only after validation on a test unit—never update production equipment without testing first. Updates occasionally introduce bugs that affect performance. Monitor grounding and EMI sources to prevent noisy load cell signals and inaccurate fills. Poor grounding allows electrical interference to corrupt weight readings. Check ground connections quarterly and after any electrical work nearby. Choose immediate backups after recipe changes or calibration adjustments. Choose scheduled weekly backups as a safety net regardless of changes made.
What Annual (And Shutdown) Maintenance Should Be Planned For Long-Term Performance?
Annual inspection addresses wear that accumulates over months of operation. Budget 1-5% of the original machine cost for annual spare parts and preventive maintenance. Critical wearable components follow 3-7 year replacement cycles, making annual reviews essential for planning capital expenses.
What Deeper Inspections Should Be Done During Planned Downtime Or Overhauls?
Complete disassembly of removable contact parts—weighing buckets, feed pans, chutes, funnels—allows inspection impossible during production. Wash components in warm water at 30-50°C using neutral detergent. Sticky parts may require 5-minute soaking. Use food-grade degreasers for greasy or allergenic residues. Wipe down the frame, underside, and electrical cabinets to prevent dust-related overheating.
What Should Be Re-Certified Or Revalidated For Regulated Products And Audits?
Load cell recalibration with certified weights is an annual requirement. Additional calibration is needed after mechanical service involving hoppers or load cells, and when product characteristics change significantly. Maintain calibration certificates and logs for auditing. Comprehensive performance testing validates weighing accuracy across all operational parameters and provides documentation for regulatory compliance.
When Should You Schedule OEM Service Visits, Rebuild Kits, Or Upgrades?
Use genuine OEM parts to preserve machine accuracy and software compatibility. OEM partnerships provide authorized calibration support and access to rebuild kits. Install available firmware updates during annual maintenance after validation. Choose predictive maintenance scheduling—using vibration sensors, temperature sensors, and cycle counters—to service equipment before failures occur. Choose calendar-based OEM visits when predictive monitoring is unavailable.
How Can You Prevent Repeat Problems And Document Maintenance Like A Pro?
Documentation transforms maintenance from reactive firefighting into systematic prevention. Good records reveal patterns, speed troubleshooting, and provide audit evidence.
What Training, Standard Work, And Shift Handoffs Keep Routines Consistent?
Train operators on correct changeover procedures, basic cleaning, and simple troubleshooting. Operator training significantly reduces operator-caused issues. Develop easy-to-follow SOPs with visual aids and photos for consistent execution across shifts. Maintain shift logs covering production rates, major adjustments, and alarms. Choose detailed SOPs with photos for complex tasks. Choose simplified checklists for routine daily cleaning.
What Maintenance Logs And Spare Parts Plans Reduce MTTR And Emergency Costs?
Use CMMS software or structured checklists to track completed tasks and schedule upcoming calibrations. Stock critical wear parts—sensors, solenoids, belts, motor brushes—to meet supplier lead times. Keep one spare per major line for sensors and photoeyes. Document parameter changes for root-cause analysis when issues occur. Parts on the shelf cost less than production stopped waiting for delivery.
What Final Habits Help You Sustain Accuracy, Uptime, And Compliance Year-Round?
Preventive maintenance minimizes unplanned stoppages that disrupt production schedules. Consistent filling accuracy reduces product giveaway and directly impacts profit margins. Regular multihead weigher maintenance supports regulatory compliance—food safety, HACCP, and GMP—and ensures traceability. A well-documented PM program provides essential evidence for audits and strengthens supplier negotiations. Build these habits into daily routines, and the accuracy remains stable year after year.
Keep Your Weighers Accurate—We'll Show You How
Consistent multihead weigher maintenance protects your investment and your margins. Daily cleaning, weekly calibration, and annual inspection keep weighing accuracy tight and unplanned downtime low. The procedures in this guide work—but implementing them effectively requires the right equipment and support.
At Wolf Packing, we specialize in high-performance packaging solutions, including multihead weighing systems built for accuracy and durability. Whether you need new equipment, replacement parts, or expert guidance on optimizing your current setup, we can help.
Contact us today to discuss your packaging line requirements. Let us show you how the right equipment and maintenance strategy deliver measurable results.